Search This Blog

Showing posts with label linux. Show all posts

Thursday, June 18, 2020

Linux, Newest Kernel, Old Hardware, Windows 10


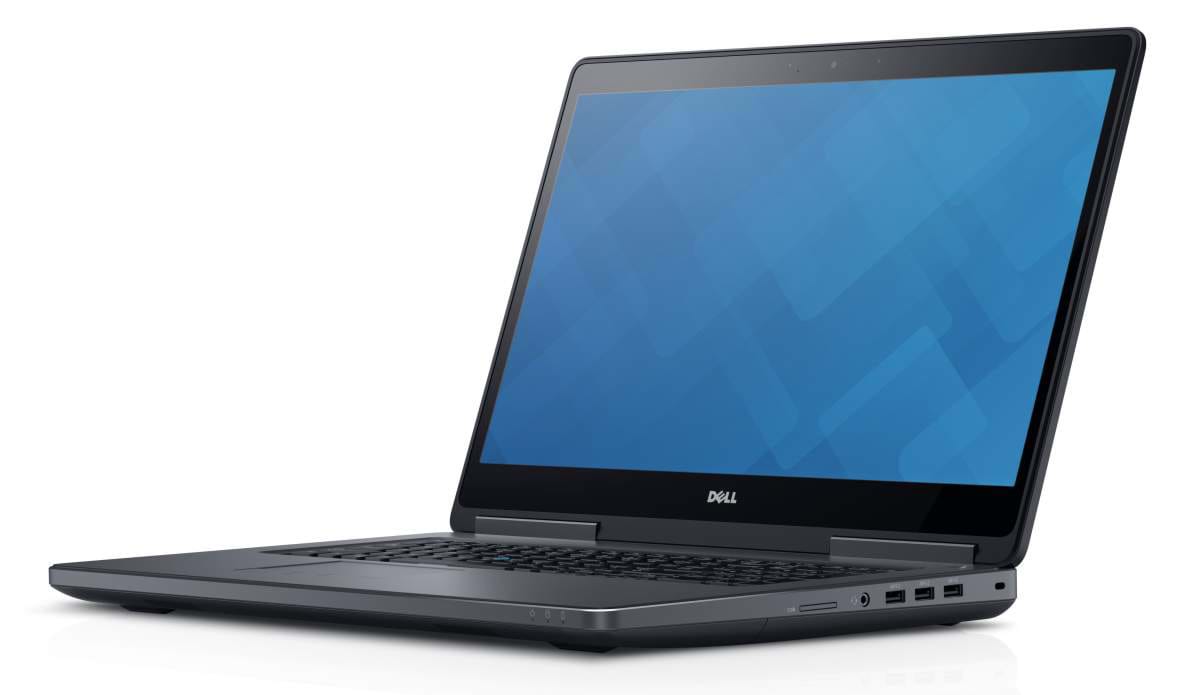
I just had to do this post!  August will be 4 years of great performance for this Dell Precision 7710.  Kudos to Dell for great hardware design. I did an in depth review here in August 2016, Linux, Newest Kernel, Newest Hardware, Windows 10 when I first set up the system.

First, big Shout Out to one of my best friends and co-workers that introduced me to Debian, Nate!  Thanks for all the tips and support over the years.  Even though you couldn't keep up w/ the bleeding edge that is... testing! LoL

Next, I must say the folks at Oracle have done great at keeping VirtualBox Free to use at home, and stable enough to keep upgrading the same VM for four years.  Also, great work with the new VBoxSVGA graphics controller with 3D acceleration.  It not only works great, but screen resize and responsiveness with graphics intensive applications is flawless, even on this older Quadro M!

Microsoft, I'm shocked.  I thought for sure I would be wiping this VM at some point. Never did I think it would be running my entire Windows Experience flawlessly virtualized with Office, VPN and Updates for years.  I have almost 4 years of content packed in there!   I even use the USB passthrough with Web Cam and Smart Card reader, to support the use of Skype!

Last but not least, Linux Debian community.  Your packaging and persistence to compatible releases and regression tests has helped keep us Debian users stable.  At this point I'm running on Buster, and have made significant upgrades.

I can't recommend this configuration enough.  Only down side has been the Broadcom 5580 Smart Card reader, which has been broken in Virtualbox for at least 10 years.  USB card readers work just fine.

I should also say I spent a few years doing photogrammetry development.  That means this machine's CPU has been pegged at 100% for >24 hours continuously, while enormous amounts of disk have been consumed and deleted, with thousands of small to large (4GB+) files.  It is an absolute work horse.

I've also carried this thing around the U.S. and dragged it through airports and scanners on multiple occasions.  The disk is still encrypted with LVM, and I've updated the password more times than I can remember at this point.

Pleased to say I am now smoothly running with:

VirtualBox 6.1.10
Windows 10 Pro Build 18362.19h1_release.190318-1202
Debian 4.19.118-2+deb10u1 (2020-06-07) x86_64 GNU/Linux

The only question now is, when do I get a new PC?  I still have 32 GB of RAM, 8 Logical CPUs running on a 6th Gen Core i7.  The GPU is totally adequate for almost all workloads, and the SSD SMART logs show no issue with the hard drive.  Wifi is fine, as well as sound.  All pluggable ports work well and the Keyboard and mouse pad has no issues or stuck keys. The backlighting for the keyboard still works as well.

One thing I did not cover in the original post (because I must have not seen the error) is the microcode for the Intel Chipset.  Make sure to install that if you see the TSC_Deadline Failure during boot. This was a "WARNING" i saw for years and ignored.  It may have effected performance but I didn't notice.  Nevertheless, I aim to understand all errors on my Linux PC, and solve them.


TSC deadline support is nice to have, but not vital. The kernel has an elaborate framework for timekeeping and timed event handling; TSC deadline is one possible implementation of event handling, but not the only one. On CPUs which support it, it is nice to have though, because it’s very efficient.

To upgrade your microcode and hopefully re-enable TSC deadline support, you can install the microcode update packages from Debian’s contrib and non-free repositories. To do so, edit your /etc/apt/sources.list to ensure that your Debian repository definitions include main, contrib and non-free; then run

# sudo apt update

followed by

# sudo apt install intel-microcode

(for Intel CPUs) or

# sudo apt install amd64-microcode

(for AMD CPUs). Once that’s done, reboot, and your microcode should be updated. If TSC deadline support is re-enabled, you won’t see the error message at boot, and you’ll see tsc_deadline_timer in the flags lines of /proc/cpuinfo.

The Debian wiki has more information on microcode updates.

Monday, May 21, 2018

Repairing Corrupted LUKS Encrypted Filesystem

This morning I noticed that my USB backup drive would not mount properly.  The first thing I did was check the dmesg log from Debian/Linux...

[1962217.824829] usb 1-5.1: New USB device found, idVendor=0bc2, idProduct=3300
[1962217.824832] usb 1-5.1: New USB device strings: Mfr=1, Product=2, SerialNumber=3
[1962217.824834] usb 1-5.1: Product: Desktop         
[1962217.824835] usb 1-5.1: Manufacturer: Seagate 
[1962217.824837] usb 1-5.1: SerialNumber: 2GHNRSVE    
[1962217.825589] usb-storage 1-5.1:1.0: USB Mass Storage device detected
[1962217.825927] scsi host4: usb-storage 1-5.1:1.0
[1962218.832372] scsi 4:0:0:0: Direct-Access     Seagate  Desktop          0130 PQ: 0 ANSI: 4
[1962218.833253] sd 4:0:0:0: Attached scsi generic sg1 type 0
[1962218.833370] sd 4:0:0:0: [sdb] 3907029168 512-byte logical blocks: (2.00 TB/1.82 TiB)
[1962218.833691] sd 4:0:0:0: [sdb] Write Protect is off
[1962218.833694] sd 4:0:0:0: [sdb] Mode Sense: 2f 08 00 00
[1962218.833991] sd 4:0:0:0: [sdb] No Caching mode page found
[1962218.833996] sd 4:0:0:0: [sdb] Assuming drive cache: write through
[1962218.842262]  sdb: sdb1
[1962218.843668] sd 4:0:0:0: [sdb] Attached SCSI disk
[1962219.029068] sd 4:0:0:0: [sdb] tag#0 FAILED Result: hostbyte=DID_ERROR driverbyte=DRIVER_SENSE
[1962219.029072] sd 4:0:0:0: [sdb] tag#0 Sense Key : Hardware Error [current] [descriptor] 
[1962219.029074] sd 4:0:0:0: [sdb] tag#0 Add. Sense: No additional sense information
[1962219.029077] sd 4:0:0:0: [sdb] tag#0 CDB: ATA command pass through(16) 85 06 20 00 00 00 00 00 00 00 00 00 00 00 e5 00
[1962219.111836] sd 4:0:0:0: [sdb] tag#0 FAILED Result: hostbyte=DID_ERROR driverbyte=DRIVER_SENSE
[1962219.111839] sd 4:0:0:0: [sdb] tag#0 Sense Key : Hardware Error [current] [descriptor] 
[1962219.111841] sd 4:0:0:0: [sdb] tag#0 Add. Sense: No additional sense information
[1962219.111844] sd 4:0:0:0: [sdb] tag#0 CDB: ATA command pass through(12)/Blank a1 06 20 da 00 00 4f c2 00 b0 00 00
[1962251.479639] JBD2: Invalid checksum recovering block 144 in log
[1962251.574260] JBD2: recovery failed
[1962251.574265] EXT4-fs (dm-4): error loading journal
[1962258.650930] JBD2: Invalid checksum recovering block 144 in log
[1962258.749283] JBD2: recovery failed
[1962258.749288] EXT4-fs (dm-4): error loading journal

This generally means that there were issues with the unmount and the "checksum"  for block 144 in the journal does not match the actual checksum from disk.  This means there is an error reading the journal, and to prevent further corruption EXT4-fs will not mount via device mapper.

So how do we fix this?  If this was not encrypted you could google this error and find out to run FSCK and hopefully be done with it.

Lets start with a quick reminder of the utility `lsblk`.

root@CLCFQ92:~# lsblk --fs /dev/sdb
NAME                                          FSTYPE      LABEL  UUID   
sdb                               
└─sdb1                                        crypto_LUKS        ce6cebbc-5026-4f47-9a22-da4aecfd26ad 
  └─luks-ce6cebbc-5026-4f47-9a22-da4aecfd26ad ext4        Backup e7bab3dc-87ce-4a7d-b758-34e2839b51f0 

 This 'console' output does not render well above using the blog defaults, so I'll have to modify it for clarity, but the thing to notice is that the File System type for sdb1 is NOT ext4, it is crypto_LUKS.  There is then an extended partition that is 'ext4' called luks-.  This luks partition is the one you want to run fsck on.  NOT /dev/sdb1 (or /dev/sdb).

So lets first open the encrypted fs...

root@CLCFQ92:~# cryptsetup luksOpen /dev/sdb1 corrupted
Enter passphrase for /dev/sdb1: 
Now, lets recover the device via the name ("corrupted") we mapped to the luks partition... 
root@CLCFQ92:~# fsck /dev/mapper/corrupted 
fsck from util-linux 2.29.2
e2fsck 1.43.4 (31-Jan-2017)
Backup: recovering journal
JBD2: Invalid checksum recovering block 144 in log
Journal checksum error found in Backup
Backup was not cleanly unmounted, check forced.
Pass 1: Checking inodes, blocks, and sizes
Pass 2: Checking directory structure
Pass 3: Checking directory connectivity
Pass 4: Checking reference counts
Pass 5: Checking group summary information
Free blocks count wrong (436669919, counted=433657941).
Fix? yes
Free inodes count wrong (121861163, counted=121856397).
Fix? yes

Backup: ***** FILE SYSTEM WAS MODIFIED *****
Backup: 245363/122101760 files (0.4% non-contiguous), 54719555/488377496 blocks
Next, disable/close the mapped name to the luks partition:
root@CLCFQ92:~# cryptsetup luksClose /dev/mapper/corrupted
Then mount/open the filesystem the way you normally would using gnome or whatever.  Check dmesh logs for confirmation!

At this point it may be good to look at using the `smartctl` utility, as your disk may be old/dying...

root@CLCFQ92:~# smartctl -a /dev/sdb
SMART Attributes Data Structure revision number: 10
Vendor Specific SMART Attributes with Thresholds:
ID# ATTRIBUTE_NAME          FLAG     VALUE WORST THRESH TYPE      UPDATED  WHEN_FAILED RAW_VALUE
  1 Raw_Read_Error_Rate     0x000f   118   100   006    Pre-fail  Always       -       200743680
  3 Spin_Up_Time            0x0003   094   093   000    Pre-fail  Always       -       0
  4 Start_Stop_Count        0x0032   100   100   020    Old_age   Always       -       72
  5 Reallocated_Sector_Ct   0x0033   100   100   036    Pre-fail  Always       -       0
  7 Seek_Error_Rate         0x000f   073   063   030    Pre-fail  Always       -       24115411
  9 Power_On_Hours          0x0032   077   077   000    Old_age   Always       -       20273
 10 Spin_Retry_Count        0x0013   100   100   097    Pre-fail  Always       -       0
 12 Power_Cycle_Count       0x0032   100   100   020    Old_age   Always       -       39
183 Runtime_Bad_Block       0x0032   100   100   000    Old_age   Always       -       0
184 End-to-End_Error        0x0032   100   100   099    Old_age   Always       -       0
187 Reported_Uncorrect      0x0032   100   100   000    Old_age   Always       -       0
188 Command_Timeout         0x0032   100   100   000    Old_age   Always       -       0
189 High_Fly_Writes         0x003a   100   100   000    Old_age   Always       -       0
190 Airflow_Temperature_Cel 0x0022   053   043   045    Old_age   Always   In_the_past 47 (Min/Max 42/47 #179)
191 G-Sense_Error_Rate      0x0032   100   100   000    Old_age   Always       -       0
192 Power-Off_Retract_Count 0x0032   100   100   000    Old_age   Always       -       19
193 Load_Cycle_Count        0x0032   100   100   000    Old_age   Always       -       767
194 Temperature_Celsius     0x0022   047   057   000    Old_age   Always       -       47 (0 19 0 0 0)
195 Hardware_ECC_Recovered  0x001a   022   021   000    Old_age   Always       -       200743680
197 Current_Pending_Sector  0x0012   100   100   000    Old_age   Always       -       0
198 Offline_Uncorrectable   0x0010   100   100   000    Old_age   Offline      -       0
199 UDMA_CRC_Error_Count    0x003e   200   200   000    Old_age   Always       -       0
240 Head_Flying_Hours       0x0000   100   253   000    Old_age   Offline      -       12697 (213 75 0)
241 Total_LBAs_Written      0x0000   100   253   000    Old_age   Offline      -       3453343066
242 Total_LBAs_Read         0x0000   100   253   000    Old_age   Offline      -       2807657092

Based on the output from the SMART controller, this disk is having a lot of errors and should be backed up and disposed of.

Friday, March 2, 2018

Easy install of NVIDIA SDK on Linux

Spent some time looking around for the best solution to this problem.  I think that it is best to download the 1.8GB installer from nvidia.  Then execute something like the following:

./cuda_9.1.85_387.26_linux.run --no-drm --no-opengl-libs --extract=/home/ottch/Development/nvidia_cuda_9_1/ --toolkit --toolkitpath=/home/ottch/Development/nvidia_cuda_9_1/ --silent

Next you'll need to execute the cuda-linux .bin file that is generated in the toolkitpath by the last command.  Ensure to set the prefix to something other than /usr/local/cuda-9.1 if you don't have sudo.


Saturday, August 6, 2016

Linux, Newest Kernel, Latest Hardware, Windows 10


About eight years ago I installed Ubuntu Intrepid Ibex, which I believe was Ubuntu 8.10.  I had a Dell desktop at work and they just rolled out, "Trusted Desktop".  The original intention of trusted desktop is simply to ensure an end-user's workstation is safe, free of viruses, and has the most recent security updates.  This helps to keep malware and attackers out of the corporate network when users plug in to it daily.

The problem for me is that because the corporation was so large, they did not ask or care about the developer's needs.  The first version of trusted desktop they rolled over top of Windows XP completely removed Administration capability, as well as installed several incompatible drivers and encryption software combinations.  Eventually these systems began showing the "Blue screen of death", and crawling to a halt under the poorly designed implementation of trusted platform computing.

At this point I saw where Windows was going with my company and discovered they would "allow" employees to use Linux if they signed a waiver and ensured they implemented a compliant disk encryption policy.  So I was off, installing Ubuntu, Virtualbox and Windows XP VM to support Windows specific work software I needed to use.  In this case it was mostly Microsoft Office and the ActiveID client drivers for my smartcard to work with the VPN software.

I didn't need wireless because this was a desktop plugged in at work.  However I did have two outputs on my video card and hoped I would be able to run a similar dual head/monitor display, the way I had been doing on XP for a couple of years.  I quickly had flashbacks of trying to get wireless drivers working on Mandrake Linux, circa 2004.  It was only a bit painful getting Ibex to use my Radeon correctly, but after all of this I was content for about a year.

Unfortunately, a year later support for 8.10 died out, and it was time to upgrade to 9.04, Jaunty. In that release, support for my old ATI Radeon GPU was dropped in favor of the newest version of X that was shipping w/ Jaunty.  I felt betrayed by the Linux community for leaving my crappy old GPU behind.  I had no idea how to write my own driver then, had my own work to do, and so I gave up and went back to Windows XP and then 7 for a long time.  Of course, later I would provide systems support for about fifty developers running Ubuntu 14.04 LTS, but this topic would cause us to digress as I usually do.

Well, this past week I have gone back to Linux, this time choosing Debian Jessie 8.  I chose Debian because I am feeling unsure about where Canonical will be taking Ubuntu in the future, and I wanted something I was already familiar with in regard to package management.  For example, I have recently used a Slackware 10 distribution on an old laptop I have, but it leaves much to be desired in regard to community support for the latest hardware.

After choosing Debian for my OS, I got a new Dell Precision 7710 laptop.  This thing really packs a punch with:
  • Intel® Core™ i7-6820HQ CPU @ 2.70GHz
  • Intel Skylake GPU w/ CPU
  • Nvidia® Quadro® M3000M w/4GB GDDR5
  • 32GB (4x8GB) 2133MHz DDR4 SDRAM, Non-ECC
  • Hynix 512GB M.2 PCIe NVMe Class 40 Solid State Drive

You can imagine my disappointment when after 8 years passing since I ran Linux on Dell for my personal system, my desktop booted with a notification that my Cinnamon desktop was being rendered in software mode.  Furthermore, my wireless interface was nowhere to be found.

The first issue was with a feature in the BIOS being enabled called Optimus.  I don't want to make this entire post about Optimus, so I'll use a reference from Wikipedia. "Nvidia Optimus is a computer GPU switching technology created by Nvidia which, depending on the resource load generated by client software applications, will seamlessly switch between two graphics adapters within a computer system in order to provide either maximum performance or minimum power draw from the system's graphics rendering hardware."

Apparently the Dell supported version of Ubuntu knows how to handle configuration this correctly.  However, Debian Jessie out of the box could not.  I chose not to attempt to enable Optimus (Optimux would have been a better name.) support on Debian, but found some interesting work here, https://nouveau.freedesktop.org/wiki/Optimus/ that may assist if you choose to do so.  For me, I have simply disabled the setting in the BIOS, and have opted for the NVidia GPU to be my primary display adapter.  Perhaps later I will investigate Optimus further.

However this led me to my next issue, in that my GPU is not yet supported by Nouveau.  The Quadro M3000M is part of the Maxwell-2 series.

NVIDIA Quadro Mobile Specification Comparison (High-End)
Quadro M5000MQuadro M4000MQuadro M3000M
CUDA Cores153612801024
Memory Clock5GHz GDDR55GHz GDDR55GHz GDDR5
Memory Bus Width256-bit256-bit256-bit
VRAM8GB4GB4GB
FP641/321/321/32
TDP100W100W75W
GPUGM204GM204GM204
ArchitectureMaxwell 2Maxwell 2Maxwell 2

A quick review of the list at https://nouveau.freedesktop.org/wiki/CodeNames/ will show you that this GPU is not supported.  So, I had to install the bundle available from Nvidia.  The important thing to remember when bundling the manufacture's driver is to ensure DKMS (Dynamic Kernel Module Support) is installed and that Nvidia uses DKMS to manage the kernel module between kernel updates.

So with my GPU now working, it was time to figure out the issue with my wireless.  A quick `lspci | grep Wireless` resolved,

02:00.0 Network controller: Intel Corporation Wireless 8260 (rev 3a)

The firmware for Intel wireless adapters generally ends up in a package called, 'iwlwifi' and once installed on most systems, will match the vendor id on your hardware during modprobe, and load the correct module.  As luck would have it, this card's module was not added/patched until November 2015.

This means my driver doesn't really show up until the November 2015 timeframe, which is kernel 4.3.  Turns out Debian has backports up to Kernel 4.6! So, upgrading with the backports should include the firmware for my wifi card.  Backports warns you to only update a package if you NEED it, and encourages you not to upgrade everything.  However, so much depends on the Linux kernel, that upgrading that specific package creates a dependency for many other backport requied packages.  As a result, I ended up using backports for pretty much all of my software.  Which is Virtualbox, X, and Gnome3.

To perform this upgrade, first gloss over, https://backports.debian.org/Instructions/.  Then, after you have added the backports repo, run the following,

$ sudo apt-get -t jessie-backports install linux-image-amd64

Once this is complete, rebooting your PC should prompt you for the latest kernel at the Debian GRUB screen, in my case this is 4.6+74~bpo8+1.  If I understand this naming convention correctly, it means
"Linux Kernel 4.6, Build number 74, Backport for 8.0 Build 1".  Which is quite the mouthful.

As a bonus, the above kernel will also include support for the latest bluetooth adapter!  The end result of all this work was a bleeding edge opensource operating system using Virtualbox 5.0 (from backports) which has USB 3.0 support and 3D acceleration!


Wednesday, March 23, 2016

QuickTip: Tree Alias

Sometimes directory structures are a bit of a nest.  You often want to see the full structure, but may not have access to packages like 'tree'.  I found a great expression and decided to wrap it into an aliased command in ~/.bash_profile

alias tree="ls -R | grep \":$\" | sed -e 's/:$//' -e 's/[^-][^\/]*\//--/g' -e 's/^/   /' -e 's/-/|/'"

Now, when you want to see a complex directory structure in the shell, just change to the working directory, and type `tree`

Custom `tree` command

Friday, August 21, 2015

There was a problem playing this protected content. (Error Code: 3336)


Once again, the powers at be, controlling DRM software integration at Google and Hulu have decided to disregard the users of 'free' software and instead prioritize users of Windows, Apple and Google Chrome/Android devices.  QoS for the mainstream is understandable.  But there is a difference between low quality code that is not efficient or ideal, and code that simply doesn't work.

What is more annoying, is that these legal issues are masquerading as 'error codes'.  It can be determined I'm using linux via browser request headers, and IF the OS is linux, and the error is DRM related, just be honest and tell me that it's not supported on this platform, because of a recent update.

I'm sure they have been forced to enabled DRM, and waited until the last minute to do so.  And didn't have time to rework the baseline framework to support HTML5 for linux users.  I'm sure they'll do it eventually, but for now are covering their lack of planning with an error code.

This is not the first time this has happened.  We all remember the days of Linux tweaks getting Netflix to work using VMs, Wine, and god knows what else.  Finally, after years of complaining, Netflix allowed HTML5, and all is well... for now.

It seems that a new update from Hulu and Google does not permit Google Chrome running on Linux variants to support DRM protected content. This is apparently due to licensing issues, copyrights, and cost.  It would seem that Hulu blindly added the DRM requirements, without considering the repercussions (Or they just don't care).

Not surprising, small businesses with a great idea like Hulu once was, has become a draconian enterprise in which legal pressure and money woes force a quality product to become sub-par and only available to paid platforms.

After working a decade in software engineering, I have realized that what is important to those of us creating the software for the rest of society, is not relevant to the mainstream.  The same users who would tell you Linux is 'shit' because you can't be productive, are the ones who will ultimately whine and complain like a child whenever their Windows boot partition shits the bed.

As expected, the Linux base is now responding with the usual rhetoric about leaving Hulu and not giving them any more money.  There are some workarounds being expressed.  But likely I'll switch to either my Windows box, or I'll end up going w/ Firefox + HAL.

 For now, here are the most informative forums with users doing exactly what I described above.

Looking forward to the comments from those of you who 'know' whats really going on.

Tuesday, September 2, 2014

Netflix Finally works on Linux

After years of waiting.  Netflix finally works with the baseline install (and apt-get dist-upgrade) of Ubuntu 14.04 LTS.  Additionally, the performance seems to be much better than Silverlight plugin on Windows 7.

I also installed a few packages from the blog article posted here: http://www.omgubuntu.co.uk/2014/08/netflix-linux-html5-support-plugins

The post at the link above is by far the most thorough and well documented guide to configuring Netflix to work with Ubuntu.  I did have to reboot my system after performing the steps, otherwise Netflix throws an error which I now cannot replicate to provide further information.

Thanks to the perseverance of the Ubuntu community, Netflix is finally supported and the Ubuntu distribution is going to get a lot more footing in the war of operating systems for desktop PCs.  Since it's still free, I'll be sticking with Ubuntu before spending any money on a Windows operating system.

Wednesday, August 20, 2014

Using USB Devices on Solaris (ZFS)

UPDATE:
Solaris 11 does not support the ZFS filesystem provided by 'native' ZFS for linux, and vice-versa.  Thus, you should export your data as NTFS so that everyone is happy, as NTFS is the most supported filesystem for 'read-only'.  Otherwise it's Solaris->Solaris only.  I have not tested native ZFS with import/export, but i suspect the version of zpool (5000 or something like that) will work fine between fedora type distros and ubuntu.


Recently I needed to export a large amount of data on our Solaris NFS Server.  However, getting this information straight off this robust server is not as intuitive or straight forward as you might first think.  Many filesystems are not natively supported by solaris, thus can cause a lot of headache trying to figure out how to use fdisk and format.  Additionally, with block sizes of 4096 (like on a Seagate 3TB hard drive) it may not even be compatible with UFS.

Before you begin, take a look at this chart on wikipedia which breaks down the various versions of zpool and zfs.  This will only work if you are using the proper version of zpool/zfs between hosts.  Currently the Native Linux ZFS project uses a zpool version not support by Solaris 11 and vice versa.  So ZFS cannot be imported between hosts: http://en.wikipedia.org/wiki/ZFS#List_of_operating_systems_supporting_ZFS

ZFS is a good solution and can be imported on other linux distributions such as CentOS or Ubuntu.  Here is a synopsis in which I exported a large amount of data with the label "TwitterFeeds"

List available drives
$ format -e
...    other disks likely shown here...
54. c9t0d0 <Seagate-Expansion Desk-0604 cyl 45597 alt 2 hd 255 sec 63> /pci@0,0/pci108e,cb84@2,1/hub@6/storage@2/disk@0,0
          /pci@0,0/pci108e,cb84@2,1/hub@6/storage@2/disk@0,0
Created a ZFS pool on the USB drive, added a ZFS file system, chowned it with my default user and started rsync with nohup to log (rsync.out)
$ sudo zpool create TwitterFeeds c9t0d0
$ sudo zfs create TwitterFeeds/export 
$ sudo chown -R user:group /TwitterFeeds/export
$ nohup rsync -r --progress /sasdata/TwitterFeeds /TwitterFeeds/export > rsync.out 2>&1&
Example entry of output in rsync log:
bytesize Percent% xferRate Time(file#, to-check=filesremain/estimatedtotal)Absolute/File/Path/Filename.ext
805313211 100%   29.23MB/s    0:00:26 (xfer#364, to-check=1008/1417)TwitterFeeds/08/19/2014/05/17/22/10FEB25021318-S3DM_R5C4-053771096010_01_P001.DAT
You can use tail -f on the rsync log to periodically view progress.
$ tail -f /TwitterFeeds/export/rsync.out
Once rsync has completed, the ZFS File System and Zpool are unmounted and removed from your available zpools.
$ sudo zpool export TwitterFeeds
The USB Drive can now be physically removed and plugged into another computer.  Plug USB Drive in to target system.  ZFS detects any moved or renamed devices, and adjusts the configuration appropriately. To discover available pools, run the zpool import command with no options. To import a pool, specify the name as an argument to the import command (TwitterFeeds).  By default, the zpool import command only searches devices within the /dev/dsk directory. If devices exist in another directory, or you are using pools backed by files, you must use the -d option to search alternate directories.  This may be required when using CentOS/Ubuntu with ZFS.
$ zpool import TwitterFeeds
$ zpool import -d /dev/rdsk/c9t0d0 TwitterFeeds #specifying disk device path manually
Once Imported, "$ sudo zfs get all" should show a PROPERTY mount point for the zpool to access the data. From this point you should be able to use native OS filesystem utils like cp, rm, chmod, and others.

Reference Links:
Managing ZFS Storage Pools
Managing ZFS File Systems (Not the Physical Devices!)
Using ZFS on Linux

Thursday, July 10, 2014

Apt-cacher with Docker

I have been working with docker from www.docker.io for couple of weeks and I love it.  I have made containers for Postgres w/ postgis extensions, Accumulo/HDFS/Zookeeper running pseudo-distributed, geoserver and as of yesterday, an apt-cacher for our Ubuntu 14.04 workstations at the office.  Here is all you need!

You can get the /etc/apt-cacher/apt-cacher.conf from an ubuntu system after installing the apt-cacher package.

#
# example ubuntu 14.04 apt-cacher
#

FROM ubuntu:14.04
MAINTAINER championofcyrodiil.blogspot.com

USER root
RUN apt-get update
RUN apt-get -y -q install apt-cacher
ADD apt-cacher.conf /etc/apt-cacher/apt-cacher.conf
ADD start-cacher.sh /root/start-cacher.sh
RUN chmod +x /root/start-cacher.sh
EXPOSE 3142


#Default Docker Run Comamnd(s)
CMD ["/root/start-cacher.sh"]


And of course, the 'start-cacher.sh' bash script.  Make sure it has been chmod +x so it's executable.

#!/bin/bash
/usr/sbin/apt-cacher -R 3 -d -p /var/run/apt-cacher.pid
tail -f /var/log/apt-cacher/access.log
wait


Once that is done, you will want to place all three files in to a single folder, cd to that folder and build the docker image, here is my example:


 $ sudo docker build -t local:apt-cacher .

Note the period at the end to specify the context of the current directory with the scripts.  Next it is time to run the container, make sure the host (-h) matches the daemon listening host specified in /etc/apt-cacher/apt-cacher.conf.

$ sudo docker run -d -p 3142:3142 -h apt-cacher local:apt-cacher

$ sudo docker ps -sl
CONTAINER ID        IMAGE               COMMAND                CREATED             STATUS              PORTS                    NAMES               SIZE
7b6a7ff25691        local:apt-cacher    /root/start-cacher.s   18 hours ago        Up 18 hours         0.0.0.0:3142->3142/tcp   clever_hoover       361.4 MB

For client systems to use the proxy, add the file /etc/apt/apt.conf.d/01proxy with the contents:

Acquire::http::Proxy "http://$DOCKERHOST:3142";

Like so,
$ sudo echo 'Acquire::http::Proxy "http://:3142";' >> /etc/apt/apt.conf.d/01proxy

Thursday, May 8, 2014

nomachine (!M) NX client on ubuntu LTSP thick/fat clients

The NX client/server software released from the company NoMachine, is fantastic.  I did discover that their Linux x86 installer does not properly handle missing dependencies on a CentOS 6.5 Minimal installation.  But it was my fault for mistakenly choosing the wrong binary from their download site.  Nevertheless, A few yum installs later, and even their 32 bit client is fantastic! Of course, I'm running their x64 client in our development environment now.

There is a lot to take in when you first run the client tool.  Its classy simple icon, installer, and website pitch, leads you to believe this magic tool will just work without a lot of features.  And for me, it did.  Every time. On different platforms.  The streaming of multimedia through the nx client over seperate UDP port is genius. And there are tons of small features that make this worth the effort.


There isn't a custom view you can't get with their client.  All of your devices are integrated as well.  I haven't even started to use collaboration tools.  But they are there if you need them, and even include recording video sessions.


I am running their software on the newest Ubuntu 14.04 LTSP "fat" client desktop.  I initially ran into an issue with the thick client LDM sessions not properly locking the screen.  Filed a bug report with launchpad here: https://bugs.launchpad.net/ubuntu/+source/unity/+bug/1316320.  I was able to work around by installing the classic xscreensaver package with the gl extras.  Not only is this batch of screen savers really cool, but it enables you to create a desktop and unity bar shortcut that will activate the xscreensaver-command lock.  Just make sure you enable the authentication dependencies on on the client image as well.  Otherwise your screen cannot be unlocked if your client session is logged in with a terminal server account that isn't also on the image.


The hardware I chose was the Intel NUC.  There are several variations to this model, but the model #D34010WYKA worked great for me.  With a modern monitor and using the display port as the primary output.  Running this PC without hard disk or wireless networking is very snappy.  With the NoMachine client on top of that, I can stream Youtube video with audio, flawlessly from a headless KVM running CentOS 6 and a "nohup" GDM session.  It was quite impressive.


My next investigation will be deeper into virus scanning solutions for the LTSP environment.  Although the client image is read-only.  A user can still execute downloaded code from their home folder, or temporary write space on the RAMfs (/tmp).  They could exploit vulnerabilities on your network systems and create back door entry points, causing information leakage, and more.  Often users who aren't intentionally malicious will pick up these Trojans and viruses from various websites.  Having a modern virus scanning engine will stop a lot of this junk.  It may not stop someone creating custom code and targeting your network specifically.  But it will help ensure avoidable accidents don't happen.


ClamAV is looking like a good bet.  It is an open source (GPL) antivirus engine.  But McAfee has a lot of years under their belt and is already on the approved list for a lot of organizations.  Corporate solutions tend to have a bit smaller footprint than the Best Buy 1st year free edition you often get with buying a PC from a partnered vendor.  And paid products usually include personal support.

Tuesday, January 28, 2014

kinit: Ticket expired while renewing credentials


Using Kerberos with Hadoop to enable HDFS Security, you should be familiar with the concept of a user being given a 'ticket' that has an expiration date.

The default configuration for kerberos is to set a 'Maximum Renewal Time' of 00:00:00.  This is the ammount of time that is 'added' to the time that the ticket was issued.  So if your ticket was issued on Jan 27 2014 15:25:38, then you will have (Jan 27 2014 15:25:38 + Renewal Time) until you cannot renew the ticket.  This default setting makes it impossible to renew any tickets granted, and instead they need to be kdestoryed and re-issued.

In order to fix this, you need to log into the kerberos principal database using kadmin or kadmin.local on the KDC.  Use the following command for a principal named, 'hdfs@EXAMPLE.COM'

modprinc -maxrenewlife 1week hdfs@EXAMPLE.COM
You will then be able to look at the principal's information:
kadmin.local:  getprinc hdfs@EXAMPLE.COM 
Principal: hdfs@EXAMPLE.COM
Expiration date: [never]
Last password change: Sat Jan 25 21:33:34 EST 2014
Password expiration date: [none]
Maximum ticket life: 1 day 00:00:00
Maximum renewable life: 7 days 00:00:00
Last modified: Tue Jan 28 11:19:59 EST 2014 (root/admin@EXAMPLE.COM)
Last successful authentication: [never]
Last failed authentication: [never]
Failed password attempts: 0
Number of keys: 4
Key: vno 1, aes256-cts-hmac-sha1-96, no salt
Key: vno 1, aes128-cts-hmac-sha1-96, no salt
Key: vno 1, des3-cbc-sha1, no salt
Key: vno 1, arcfour-hmac, no salt
MKey: vno 1
You will still need to use 'kdestroy' and 'kinit' to get a new ticket, since the old one cannot be renewed.  However, your new ticket will be renewable for a week.  It should also be noted that when adding a new principal to the database, the default Renewal time will be obtained from the ticket granting server's Principal (krbtgt/EXAMPLE.COM@EXAMPLE.COM).  If you want all users added in the future to have a week long renewal period, you will need to modify that principal as well.


Wednesday, August 28, 2013

Elaborate Linux Script for determining IP

Sometimes the ordering of your Ethernet adapters are not the same on a specific machine vs the others in your cluster.  So simply grepping the IP based on adapter name can be a little tricky.  So I just made this script to do it for you.

#! /usr/bin/env bash
for network in $(cat /proc/net/dev | grep ':' | cut -d: -f1 | awk '{ print $1 }'); do
if [ "$network" != "lo" ]
then
echo $(/sbin/ifconfig $network | grep 'inet addr:' | cut -d: -f2 | awk '{ print $1}')
fi
done


Clearly you could modify the if condition to fit your needs.

Monday, July 29, 2013

Change Linux system clock safely with bash script

I learned the hard way a month or two back that you cannot just change the server time when running zookeeper with distributed cloud services on a single server.  Often changing the system clock to a time which is greater than the zookeeper session time (2x the tick time, ~ 4000 ms by default) you can easily break zookeeper session synchronization.

The fix is to change the time little by little until it is where you want it.  Here is an example in which I speed up the clock by 1 second every 10 seconds.  This has been tested and worked while cloud services are running without breaking anything.

#! /usr/bin/env bash

#Increase server time by 960 seconds(16mins) over a 9600 second(2hrs40mins) period.

for i in {1..960}
do
later=$(date --date="+1 second")
echo $later
date -s "$later"
sleep 10
done

Tuesday, January 29, 2013

JBoss (Too Many Files Open)

I was redeploying JBoss on to a new server today.  It was already configured so i didn't think i would have any issues when starting.  However i quickly saw many java.io.Exceptions in the server log.

After a quick bit of research I discovered that the user I created to run JBoss, (webadmin) needed an increase in the maximum number of files that it could have open in the system at one time.

If using Cent OS 6.2  do so by editing the limits.conf file in the /etc/security folder. ( you will need to be root ).

Below is a screenshot of where i increased the limit to 200000 for webadmin.


After logging out and logging back in as webadmin.  the command # ulimit -Hn reported 200000 as the new limit on file descriptors.

After this i started JBoss and it worked like a charm.

Thursday, November 29, 2012

Adding Space to Linux LVM

After looking around at many different forums I have figured out how to properly add additional space to your VM.

In my situation I had a RHEL5 Virtual Machine running in VMware ESXi.  The machine had 50GB of space and we quickly ran out.

The first thing I did was go into the Settings for the VM using vSphere and resized the physical disk from 50GB to 256GB.

The next step was to reboot the Virtual Machine so that it would recognize the larger physical disk.  I rebooted the machine and the larger physical disk was apparent when typing the command,

#fdisk -l


Disk /dev/sda: 274.8 GB, 274877906944 bytes
255 heads, 63 sectors/track, 33418 cylinders
Units = cylinders of 16065 * 512 = 8225280 bytes

   Device Boot      Start         End      Blocks   Id  System
/dev/sda1   *           1          13      104391   83  Linux
/dev/sda2              14        6527    52323705   8e  Linux LVM


Notice that although there are 33418 cylinders in my new 274.8 GB disk, that my second primary partition /dev/sda2 is only using cylinders 14-6527.  Resizing the Partition was not a safe option and I found many links showing users that had tried and failed.

The proper way to add space is to create an additional partition.  This can be done with fdisk.

#fdisk /dev/sda

Once you are in the fdisk utility you will want to create a new partition. 'n'
Specify this as a primary partition (1-4).  I chose 3 , as I already have 2 primary partitions.

You should notice that it will than ask you where to 'start'.  It should default to the 1st cylinder available (6528 in my case).  Press Enter.  Then 'end' should default to the last cylinder on the disk. (33418 in my case).  Press Enter.

Once the partition has been created you will need to change the partition ID to LVM.  The ID for a Linux LVM partition is 8e.  

Remember to press 'w' to write your fdisk changes to disk.  Once this is done reboot your VM.

Once the VM is back up you will want to run #vgdisplay to see your VolumeGroup name.


[root@ssdev ~]# vgdisplay
  /dev/hdc: open failed: No medium found
  --- Volume group ---
  VG Name               VolGroup00...


# pvcreate /dev/sda3
# vgextend VolGroup00 /dev/sda3

Next extend the LV:
[root@ssdev ~]# vgdisplay
  /dev/hdc: open failed: No medium found
  --- Volume group ---
  VG Name               VolGroup00
  System ID
  Format                lvm2
  Metadata Areas        2
  Metadata Sequence No  10
  VG Access             read/write
  VG Status             resizable
  MAX LV                0
  Cur LV                7
  Open LV               7
  Max PV                0
  Cur PV                2
  Act PV                2
  VG Size               255.84 GB
  PE Size               32.00 MB
  Total PE              8187
  Alloc PE / Size       1120 / 35.00 GB
  Free  PE / Size       7067 / 220.84 GB
  VG UUID               iF1177-sihW-YEb3-sLIj-AhVl-m6Fd-fMKQjg

[root@ssdev ~]# lvextend -L +220.84G /dev/VolGroup00/RootVol

In the last step i specified RootVol, as that is the volume i wanted resized ( / ).  lvdisplay will list the different volumes you have, and where they are mounted:

[root@ssdev ~]# lvdisplay
  /dev/hdc: open failed: No medium found
  --- Logical volume ---
  LV Name                /dev/VolGroup00/RootVol
  VG Name                VolGroup00
  LV UUID                N7lwvY-uqMg-2PfL-R4Ph-Dnh6-9hpu-a2vWeo
  LV Write Access        read/write
  LV Status              available
  # open                 1
  LV Size                4.00 GB
  Current LE             128
  Segments               1
  Allocation             inherit
  Read ahead sectors     auto
  - currently set to     256
  Block device           253:0


Last step, resize the filesystem on the LV you just extended:

[root@ssdev ~]# resize2fs -p /dev/VolGroup00/RootVol
resize2fs 1.39 (29-May-2006)
Filesystem at /dev/VolGroup00/RootVol is mounted on /; on-line resizing required
Performing an on-line resize of /dev/VolGroup00/RootVol to 58941440 (4k) blocks.

The filesystem on /dev/VolGroup00/RootVol is now 58941440 blocks long.

[root@ssdev ~]# df -m
Filesystem           1M-blocks      Used Available Use% Mounted on
/dev/mapper/VolGroup00-RootVol
                        223030      2322    209198   2% /
/dev/mapper/VolGroup00-VarVol
                          2976       137      2686   5% /var
/dev/mapper/VolGroup00-SrvVol
                         19839       855     17960   5% /srv
/dev/mapper/VolGroup00-VarLogVol
                          3968       182      3582   5% /var/log
/dev/mapper/VolGroup00-VarLogAuditVol
                           992        46       895   5% /var/log/audit
/dev/mapper/VolGroup00-HomeVol
                          1984        68      1815   4% /home
/dev/sda1                   99         9        86   9% /boot
tmpfs                     1510         0      1510   0% /dev/shm
[root@ssdev ~]#

This step should take a while, you can see the disk I/O in vSphere: