Search This Blog

Sunday, December 14, 2025

Catching up on old games in 2025

 Lets be honest. In late 2025, there are so Many games to play, and new games coming out, you just have to accept that you won't get to play them all.  There just isn't enough time.  However, if you're like me, you have a ton of games to play and catch up on. And that actually works really well for budget!

I recently picked up an NVidia GTX 3070 Ti for $305 on E-Bay.  It is working perfectly, and I need to log into ebay and give the seller a great rating soon.

Anyway, with the 3070, a lot of titles I never had time to play or finish will run smooth as butter at the highest settings.

Here is my collection either on the HDD or SSD on my PC now, sorted in order since last played.  What have you been playing?  What am I missing?  Love to hear your comments.


Some of the games I purchased for the game files.  I use other engines & mods for games like KSP, Quake, Doom, Heretic & Hexen. If you'd like to hear more about the customizations and Mods I do. Please leave a comment.

Saturday, December 13, 2025

Improve Steam Game Patching Speed

Game was patching slow (Helldivers 2)

Low mbps (200) taking forever

Game disk was SSD but Steam using old Game Location (HDD) and Random IO was slow

Made Script to Improve:

  • MAKE SURE TARGET SSD HAS ENOUGH SPACE
  • MAKE SURE BOTH FILE SYSTEM TYPES ARE 'NTFS'

Desktop Production View


# Move-Steam-Downloading-To-SSD.ps1
# Run PowerShell "As Administrator"

$D = "D:\SteamLibrary\steamapps\downloading"
$E = "E:\SteamLibrary\steamapps\downloading"

function Assert-Admin {
    $isAdmin = ([Security.Principal.WindowsPrincipal] `
        [Security.Principal.WindowsIdentity]::GetCurrent() `
    ).IsInRole([Security.Principal.WindowsBuiltInRole]::Administrator)

    if (-not $isAdmin) {
        throw "Run this script as Administrator (needed for mklink)."
    }
}

function Ensure-Dir($path) {
    if (-not (Test-Path $path)) {
        New-Item -ItemType Directory -Path $path | Out-Null
    }
}

Assert-Admin

Write-Host "Attempting to stop Steam (ignore errors if it's already closed)..."
Get-Process steam -ErrorAction SilentlyContinue | Stop-Process -Force -ErrorAction SilentlyContinue

# Ensure parent directories exist
Ensure-Dir (Split-Path $D -Parent)
Ensure-Dir (Split-Path $E -Parent)

# If E:\...\downloading exists, rename it to downloading.old (with timestamp if needed)
if (Test-Path $E) {
    $oldBase = Join-Path (Split-Path $E -Parent) "downloading.old"
    $old = $oldBase
    if (Test-Path $old) {
        $stamp = Get-Date -Format "yyyyMMdd-HHmmss"
        $old = "$oldBase.$stamp"
    }
    Write-Host "Renaming SSD folder:`n  $E`n-> $old"
    Rename-Item -Path $E -NewName (Split-Path $old -Leaf)
}

# If D path is a junction already, remove it (so we can move/create cleanly)
if (Test-Path $D) {
    $item = Get-Item $D -Force
    if ($item.Attributes.ToString().Contains("ReparsePoint")) {
        Write-Host "D folder is a reparse point (junction/symlink). Removing it:`n  $D"
        Remove-Item -Path $D -Force
    }
}

# Move D:\...\downloading to E:\...\downloading (if it exists)
if (Test-Path $D) {
    Write-Host "Moving HDD folder:`n  $D`n-> $E"
    Move-Item -Path $D -Destination $E
} else {
    Write-Host "No HDD downloading folder found at $D (creating empty target on SSD)."
    Ensure-Dir $E
}

# Create junction from D to E
Write-Host "Creating junction:`n  $D`n=> $E"
cmd /c "mklink /J `"$D`" `"$E`""

Write-Host "`nVerification:"
cmd /c "dir `"$([System.IO.Path]::GetDirectoryName($D))`""
cmd /c "fsutil reparsepoint query `"$D`""

Write-Host "`nDone."
Write-Host "Steam should now see D:\...\downloading, but it will actually use the SSD at E:\...\downloading."
You may need to enabled Windows PowerShell Script Execution Policy for the Current User. When you successfully Run the script, it will take time to move the original Steam downloads data to the destination device you want to use (to NVMe SSD from HDD, 114 GB "reserved" for Hell Divers 2 in this case).

Desktop Production Running Script to Improve Steam Patching Game


"Why did I have to create this script and move the data? Why was steam using the D: for the Download Cache instead of the E: drive even though the game is installed on the E: drive? This seems like the wrong drive."

Steam’s “download cache” isn’t “the drive the game is on.” It’s “the Steam library folder (or client install folder) Steam has decided to use for staging,” and that choice can easily end up being your HDD even when the game files live on the SSD.

The key idea: Steam updates aren’t written straight into the game folder. Steam typically uses a staging area (steamapps\downloading, sometimes plus other cache folders) to download chunks, unpack/decrypt, and apply deltas. Steam picks where that staging lives based on library association and configuration, not on where you think the game “is.”

Common “why did it pick D?” reasons:

  • The app is logically associated with the D: library (even if you manually moved the game files at some point, or the manifest stayed on D:). Steam uses the library containing the app’s appmanifest_*.acf to decide staging. If the manifest is under D:\SteamLibrary\steamapps, Steam will stage under D.

  • D: was your default / primary library at the time of install/update. Steam will keep using that library for that app unless you explicitly “Move install folder” inside Steam.

  • Steam client caches can live where Steam itself is installed. Even if the game is on E:, certain caches (appcache, depotcache) may still hammer the drive that contains steam.exe.

  • Steam doesn’t automatically optimize for SSD vs HDD. It follows its rules: “use the library/client path I’m configured for,” not “use the fastest disk.”

So it feels like “the wrong drive,” but it’s Steam behaving consistently with its internal mapping: game location and staging/cache location are related, but not guaranteed to match.

Why your script/junction helps:

  • If Steam insists on using D:\SteamLibrary\steamapps\downloading, you can “lie” to it safely with a junction so it still uses the path it expects, while the I/O lands on E:. This is especially helpful because downloading is often random-I/O heavy, where an SSD can be dramatically faster than an HDD.

If you want a “Steam-native” fix (no junction), the usual solution is:

  • Steam → Settings → Storage → select the game → Move to the E: library

  • Also set E: as the default library

  • Ensure the relevant appmanifest_*.acf ends up under E:\SteamLibrary\steamapps\

But if Steam keeps choosing D: for staging anyway, your junction approach is a perfectly logical workaround.

Thursday, June 18, 2020

Linux, Newest Kernel, Old Hardware, Windows 10


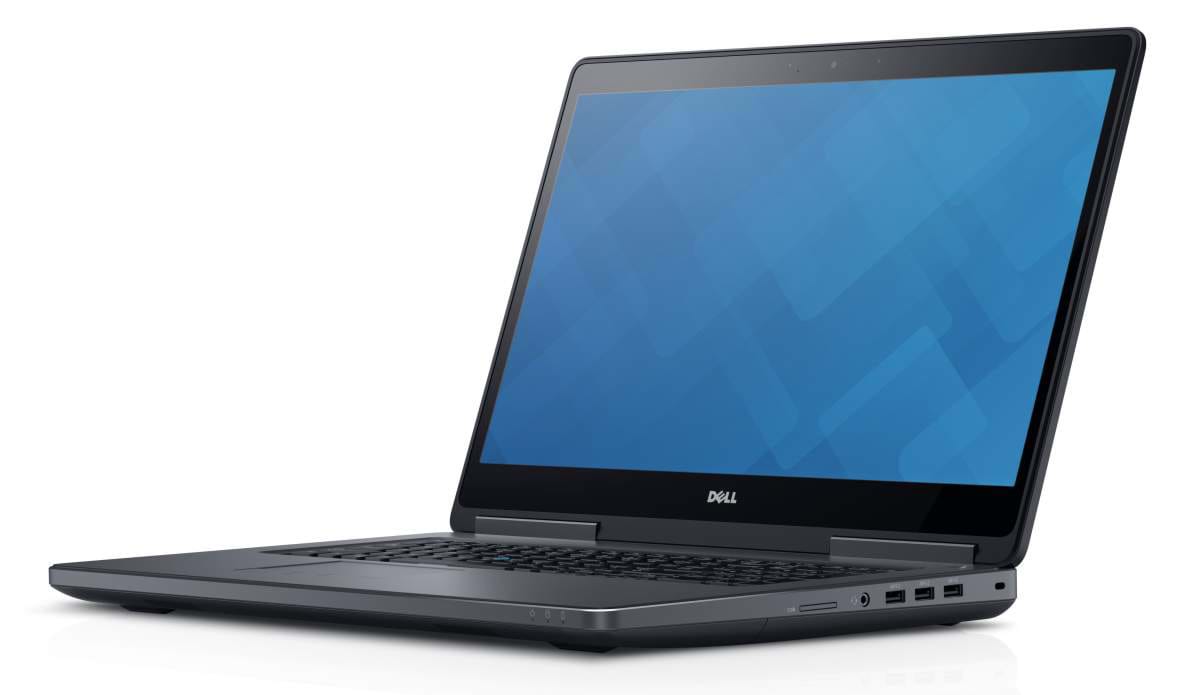
I just had to do this post!  August will be 4 years of great performance for this Dell Precision 7710.  Kudos to Dell for great hardware design. I did an in depth review here in August 2016, Linux, Newest Kernel, Newest Hardware, Windows 10 when I first set up the system.

First, big Shout Out to one of my best friends and co-workers that introduced me to Debian, Nate!  Thanks for all the tips and support over the years.  Even though you couldn't keep up w/ the bleeding edge that is... testing! LoL

Next, I must say the folks at Oracle have done great at keeping VirtualBox Free to use at home, and stable enough to keep upgrading the same VM for four years.  Also, great work with the new VBoxSVGA graphics controller with 3D acceleration.  It not only works great, but screen resize and responsiveness with graphics intensive applications is flawless, even on this older Quadro M!

Microsoft, I'm shocked.  I thought for sure I would be wiping this VM at some point. Never did I think it would be running my entire Windows Experience flawlessly virtualized with Office, VPN and Updates for years.  I have almost 4 years of content packed in there!   I even use the USB passthrough with Web Cam and Smart Card reader, to support the use of Skype!

Last but not least, Linux Debian community.  Your packaging and persistence to compatible releases and regression tests has helped keep us Debian users stable.  At this point I'm running on Buster, and have made significant upgrades.

I can't recommend this configuration enough.  Only down side has been the Broadcom 5580 Smart Card reader, which has been broken in Virtualbox for at least 10 years.  USB card readers work just fine.

I should also say I spent a few years doing photogrammetry development.  That means this machine's CPU has been pegged at 100% for >24 hours continuously, while enormous amounts of disk have been consumed and deleted, with thousands of small to large (4GB+) files.  It is an absolute work horse.

I've also carried this thing around the U.S. and dragged it through airports and scanners on multiple occasions.  The disk is still encrypted with LVM, and I've updated the password more times than I can remember at this point.

Pleased to say I am now smoothly running with:

VirtualBox 6.1.10
Windows 10 Pro Build 18362.19h1_release.190318-1202
Debian 4.19.118-2+deb10u1 (2020-06-07) x86_64 GNU/Linux

The only question now is, when do I get a new PC?  I still have 32 GB of RAM, 8 Logical CPUs running on a 6th Gen Core i7.  The GPU is totally adequate for almost all workloads, and the SSD SMART logs show no issue with the hard drive.  Wifi is fine, as well as sound.  All pluggable ports work well and the Keyboard and mouse pad has no issues or stuck keys. The backlighting for the keyboard still works as well.

One thing I did not cover in the original post (because I must have not seen the error) is the microcode for the Intel Chipset.  Make sure to install that if you see the TSC_Deadline Failure during boot. This was a "WARNING" i saw for years and ignored.  It may have effected performance but I didn't notice.  Nevertheless, I aim to understand all errors on my Linux PC, and solve them.


TSC deadline support is nice to have, but not vital. The kernel has an elaborate framework for timekeeping and timed event handling; TSC deadline is one possible implementation of event handling, but not the only one. On CPUs which support it, it is nice to have though, because it’s very efficient.

To upgrade your microcode and hopefully re-enable TSC deadline support, you can install the microcode update packages from Debian’s contrib and non-free repositories. To do so, edit your /etc/apt/sources.list to ensure that your Debian repository definitions include main, contrib and non-free; then run

# sudo apt update

followed by

# sudo apt install intel-microcode

(for Intel CPUs) or

# sudo apt install amd64-microcode

(for AMD CPUs). Once that’s done, reboot, and your microcode should be updated. If TSC deadline support is re-enabled, you won’t see the error message at boot, and you’ll see tsc_deadline_timer in the flags lines of /proc/cpuinfo.

The Debian wiki has more information on microcode updates.

Saturday, February 8, 2020

Synology Follow-Up

In the previous post (https://championofcyrodiil.blogspot.com/2020/02/synology-home-nas.html) I configured the Synology DS218j through a virtual network using an Ubuntu VM as the DHCP Server.  Today I wanted to back up some of my files, so I needed to configure some kind of share.

Enable SSHd on the VM

  1. $ sudo apt-get install -y openssh-server
  2. $ sudo systemctl enable ssh.service
  3. $ sudo systemctl start ssh.service

Create an Account on Synology

You will need an account to connect to on the Synology.  You could use the admin account, but don't.  This was easy enough and walking through the Wizard after clicking "Users" somewhere in Control Panel, I created an account named 'charlie'.  
The Control Panel is easy to find when you log in with the Web Browser on port 5000 over HTTP
HTTP is Plain-Text and thus Not Secure.  This is another good reason we are working on a private virtual network, as there are no other devices that could be snooping.

Check SMB Settings

By default SMB is enabled, but I discovered I needed to enable SMB version 3.0 on the Synology!  You'll find this under the "Advanced" SMB settings. 


Create a "New Folder"

Creating an account by itself does not create a Share/Folder that can be accessed from a remote client.  You'll need to create a new folder as well.  Again, the UI is intuitive and you should be able to navigate to "Folders" in the control panel, and create a new one, giving your user account created in the previous step "Customized" permissions.  I enabled "Full Control".  


Also, when creating the folder I set a password and enabled disk Encryption.  Filename lengths are restricted to ~170 characters in your storage folder if encryption is enabled.

Mount the Synology Share using CIFS

You'll need to install 'cifs-utils' using apt-get install first.  Then you can easily add the entry to the /etc/fstab using sudo.

Note the 'user' option.  This allows you to mount with the 'vubuntu' user, making it read/write approved for the SSH User.  Using `sudo mount` works too, but then accessing the VM remotely would require an SSH as root.  You can only SSH as root after modifying the "PermitRootLogin" setting in /etc/ssh/sshd_config.

Was all that Worth it???

I would have to say it was.  The goal was to back up my Desktop PC's data to the Synology, and I've achieved peek throughput of 540 Mbps while using WinSCP to move files from the Desktop's E:\ Storage drive to the Synology over the Cat5 cable.  Which is 67.5MB/sec.

While the connection is 1Gbps, Secure Shell and Virtualization are at play.  Again, this isolates the Synology from the web, while still providing high throughput.  Don't forget to run your Virus Scan on files before backing them up!


Synology Home NAS

Virtual Networked NAS

Everything Configured from My Desktop PC running Windows 10; Color-Coded based on Trust, where Green is obviously the most trusted.

Purchase and Put Together:

Total: $386.42
Both Seagate IronWolf 4TB Drives Installed in Synology DS218j

Create Virtual Switch for Desktop NIC:

  1. From Hyper-V Manager, Click "Virtual Switch Manager" on the Left-Hand "Action" Panel
  2. Select "External" for Create Virtual Switch Type
  3. Set Name as value that will be intuitive for your Desktop NIC. e.g. 'Wired External Switch"
  4. Choose the Ethernet Device Connected Directly to Synology NAS Device
Creating an External Switch in Hyper-V
Think of this as a 'physical' switch between your CPU and Network Card, with only 1 port (Your NIC!)

Create Virtual Machine and Install using ISO


Don't forget to add a second virtual NIC to the VM and attach it to the previously created external switch.
Creating "Dual-Homed" VM w/ 2 Virtual NICs
One for Synology, One for Internet(NAT)

Static IP for "Wired External Switch"

You've now got everything connected.  When you boot ubuntu you'll see 1 NIC has an IP (dhcp) from Hyper-V and provides Internet Connectivity.  The second is not enabled at all.  You'll need to enable this by editing /etc/network/interfaces as follows:
Configure Ubuntu to have a Static-IP.  This is normal for Servers that provide DHCP
Ensure 'eth0' or 'eth1' corresponds with the External Switch chosen above.
'sudo ifup eth0' will bring your NIC online after editing the interfaces file

DHCP Configuration (This part can be tricky)

I've used the 192.168.10.0/32 network in this example to match up with the information provided in the link above.  Make sure to check your syntax after editing the file.  `ps -ef | grep dhcpd` should show the server is running.  If there are errors, use `journalctl` to view any errors, fix them, and use `sudo systemctl restart isc-dhcp-server.service`.  Once DHCP is running and everything is connected, you should see a Lease for the Synology using `cat /var/lib/dhcp/dhcpd.leases'.

Make sure to enable 'authoritative' DHCP, since this DHCP server is the only one on this External Switch.

Set up your Synology, Download the OS with VM

When the Synology gets an IP, it should get the first IP in your DHCP range. For me this was 192.168.10.10.  Inside your VM, open a browser and go to http://192.168.10.10 
You will be redirected to set up the device.  Your device wont have an internet connection because we did not configure the VM to act as a gateway/router.  So you'll need to click the link provided in the Synology setup, and Download the OS software to the VMs Downloads folder.  Once complete, verify the checksum `md5sum ~/Downloads/DSM_DS218j_24922.pat`.  This ensure you are getting the right software and no corruption occured during download.  Then switch back to the Synology configuration Tab, and Choose "Select a File/Browse", navigate to the Downloads folder, and 'upload' the .PAT file to the Synology via the web interface.  Finish the configuration and make sure to remember your NAS does NOT HAVE INTERNET CONNECTIVITY.  This is so that you can ensure it is secure and not downloading software you do not explicitly provide.

Once configured using Defaults, you should have 2 drives providing redundant storage with 3.6TB of Storage

What Next?

Now that everything is connected you'll want to think about how you want to access your synology from other devices.  You could simply connect the Synology to your Wifi Router now and access it via wifi.  However, this would expose it to the internet, so make sure you want to do that.

Another option would be to configure the Virtual Machine as a "Reverse-Proxy" for HTTP/HTTPS or set up the routing tables to forward specific ports and provide NATing back to the requester.  There are several possibilities at this point and I hope you have found this tutorial useful and informative.

Read more on how I configure SMB w/ SCP between the Host OS, VM and Synology devices in the next post, https://championofcyrodiil.blogspot.com/2020/02/synology-follow-up.html

Saturday, June 15, 2019

2005 Ford Expedition A/C Compressor Bypass Belt

Here are the signs your A/C is failing and you're in for some serious repairs.
  1. You smell a burning while A/C is running.  Not like burning rubber, more like burning electronics or wires/metal.
  2. You immediately turn off the vehicle because of the smell, and then later when you turn it on, NOTHING happens.  No turn over, no rough start, just a click and silence.
  3. Your Battery is fine, the starter is fine, and MAYBE it starts up again a while later.
In my case, this was the A/C failing.  The compressor is depicted below as part #9. It is part of the serpentine belt pulley configuration. #8 is the crankshaft pulley connected to the engine, and as you can see, WILL NOT TURN OVER IF ANY OF THE OTHER PULLEYS ARE SEIZED.  This is because the Starter (which starts the engine by turning over the crankshaft) doesnt have enough 'juice' to force the frozen pulley.


In my case, #9 froze up so tight the belt started squealing, burning up, and snapped in half.  These belts typically only handle a little over 260°F before they break.  With #9 seized up, and a 5.4L V8 forcing the belt to slide around it, eventually it will heat up and break.  At that point all of the check engine lights come on your dashboard, and you will lose power generation (battery wont charge, #3), power steering (hard to turn the wheel, #5), Cooling for the Engine, (overheating, #7) which will result in the need to replace the engine if it gets too hot (>190-210°), and of course A/C (#9).

So, now you have no belt, and #9 is seized.  You could have it towed, and spend $1500+ dollars getting the A/C components replaced, flushed, and re-charged.  In my case, I had pulled forward in to my driveway and wanted to do the work myself, but needed to move the vehicle.   So I started looking in to 'bypassing' #9!

This would look something like this.


If you're paying attention, you might notice the most obvious issue here is figuring out how long the new belt needs to be.  Another thing I chose to do was replace pulley #2.  Not only are the bearings likely old on this pulley, but in my case the pulley is 'smooth' and not 'grooved'.  I was concerned about the belt 'slipping' off the pulley, so i replaced it with an aftermarket pulley.

To figure out how long of a belt you need, use a piece of string and run it through the same path.  Measure the string and purchase a belt of the same length.

On my 2005, 5.4L V8 Expedition the options are:
  • Duralast 840K6 - 84.06" (Bypassing the A/C Clutch Pulley)
  • Duralast 1015K6 - 101.5" (Stock Belt, including the A/C Clutch Pulley)
(Duralast is just what is at my local autozone.  Just make sure to compare size, rib count, etc.)
You may notice on websites like Autozone, you cannot search by 'length', only by part number.  The pattern for these duralast belts seem to be 1/10" increments, and I guess K6 has to do with the 6 "ribs" on the inside of the belt.

e.g. 101.5 Inches is 1015K6  and 84.0 inches is 840K6, and so on.

Link to Autozone's Site with Belts ~ $25
Link to Autozone's Site with Idler Pulleys ~ $20
Breaker Bar ~ $17
Total Cost: $62

Make sure you have a breaker bar (1/2" drive) that plugs in to the square hole in #1. Pushing downward (away from the belt), you should feel the spring loaded tensioner move.

To replace the belt,
  1. Start with dropping a loop straight down under #8 looking down at the engine standing in front of the car.  YOU DON'T NEED TO GO OVER YOUR FAN BLADES, just around it!
  2. Keeping your left hand at the 9 o'clock on #8 so the belt doesn't fall off, with your right hand, guide the belt clockwise around #7, continue over and under #6, still keeping your left hand at the 9 o'clock position on #8. (Read that step a few times)
  3. Continue around #5, skip #4 and over #3.
  4. you can probably move your left hand now!  Slip it over #2 and around the tensioner.
  5. Using the breaker bar, adjust the tensior and go back to #4 (which is a smooth pulley) and slip it over the pulley.  Release the tensior.
  6. Double check EVERYTHING ensuring the belt is in the grooves, and around all pulleys.  You'll likely notice if there is an issue.
This may feel impossible when you start, but stick with it and you'll find it to be pretty easy when you are done.


It will look like this after replacing the Idler Pulley (#2) and using the shorter belt:
AC Bypass 1.jpg

AC Bypass 3.jpg

You'll notice the belt goes from #2 (the new black pulley in the top left), around the tensioner to the crank pulley #8.   Aka "Bypassing #9".

You should now be able to drive the car, however will not have A/C.

NOTE: I am not a certified mechanic nor am I a mechanical engineer.  Here are a few other things to consider.
  • A shorter belt with different sized pulleys and less of them will create a modified load on the engine.  The tensioner provides a 'factory' tension, so I think it should be fine, but it is not how the car was designed so there could be additional issues with this that I am not aware of.
  • The 'modified' load on the crankshaft is probably marginal compared to the load of say, towing a trailer with cement bags, but perhaps still worth consideration.  Comments welcome if you're a mechanical engineer and have thoughts on this.
  • I'm too tired to go back outside and take a photo, so credit to this forum post for great photos of a 4.6L V8, which is VERY similar to mine.
  • Be ready to make multiple trips to the store.  I got a Duralast 800K6 (79.?") the first time and it was too short.  No free lunch here, just measure the best you can using string/twine and hope you got it right.
  • If your A/C is fine now, but car is like mine and old, consider getting a belt and breaker bar for your trunk.  This can be done in a parking lot and could save you a tow for a long trip.
  • There are likely to be typos, quirks in grammar and terminology, or instances above where I mention pulley X and meant pulley Y.  This isn't rocket science so just use your sense and I think you will figure it out.

I wrote this blog because I couldn't find a great resource for the 2005 Ford Expedition 5.4L V8 Triton Engine.  Later I came across the forum post in the notes above, and finally got motivated to get that second belt (840K6).  I hope this is helpful for someone else.

6/16/19 Update:  After letting the Battery trickle charge overnight (it's been sitting for months), I fired it up this morning and it has been running for more than 25 minutes.  Took it for a spin down the street and all seems well for now.  Brakes are rusty, Power steering is a little tight, but hopefully all that smooths out with some additional use.

Sunday, March 24, 2019

Unity3D with QGIS and GIMP

It has been a long time since I have posted anything on here. I now have my own commercial drone (and FAA license) with a nice camera, and I've integrated several open source projects so that I can create 3D models from imagery/video (photogrammetry).

So now I am looking to create a sort of unity experience so that I can showcase places I've visited in 3D, and embed them with the larger general area.  I think I will have a good amount of learning to do before I'm able to create transitions from 'high altitude' scenes to 'low altitude' scenes where vegetation might appear.  I don't think I want to try to "Place Mass Trees" with this large of an area.

I am calling the concept "ODT" or "Open Digital Twin" (Copyright OTT LLC 2019).

As you can see, the result is actually pretty nice.  You can obtain stereo DEMs (digital elevation models) from the USGS using WMS service calls.  I then created a Normal Map, and also used USGS WMS to fetch a high altitude imagery color map.

When creating the height map for unity, you'll need to ensure you are saving the map as "Raw Image File" with Planar mapping.

There is still plenty of work to be done, but I thought this might be a fun update to get me back in the blogging mode.  It's been too many years, and I've come a long way from the original work I did with Java & Hadoop.  Hopefully these GIS and 3D skills will couple nicely with my enterprise experience to bring 3D to the enterprise!

Monday, May 21, 2018

Repairing Corrupted LUKS Encrypted Filesystem

This morning I noticed that my USB backup drive would not mount properly.  The first thing I did was check the dmesg log from Debian/Linux...

[1962217.824829] usb 1-5.1: New USB device found, idVendor=0bc2, idProduct=3300
[1962217.824832] usb 1-5.1: New USB device strings: Mfr=1, Product=2, SerialNumber=3
[1962217.824834] usb 1-5.1: Product: Desktop         
[1962217.824835] usb 1-5.1: Manufacturer: Seagate 
[1962217.824837] usb 1-5.1: SerialNumber: 2GHNRSVE    
[1962217.825589] usb-storage 1-5.1:1.0: USB Mass Storage device detected
[1962217.825927] scsi host4: usb-storage 1-5.1:1.0
[1962218.832372] scsi 4:0:0:0: Direct-Access     Seagate  Desktop          0130 PQ: 0 ANSI: 4
[1962218.833253] sd 4:0:0:0: Attached scsi generic sg1 type 0
[1962218.833370] sd 4:0:0:0: [sdb] 3907029168 512-byte logical blocks: (2.00 TB/1.82 TiB)
[1962218.833691] sd 4:0:0:0: [sdb] Write Protect is off
[1962218.833694] sd 4:0:0:0: [sdb] Mode Sense: 2f 08 00 00
[1962218.833991] sd 4:0:0:0: [sdb] No Caching mode page found
[1962218.833996] sd 4:0:0:0: [sdb] Assuming drive cache: write through
[1962218.842262]  sdb: sdb1
[1962218.843668] sd 4:0:0:0: [sdb] Attached SCSI disk
[1962219.029068] sd 4:0:0:0: [sdb] tag#0 FAILED Result: hostbyte=DID_ERROR driverbyte=DRIVER_SENSE
[1962219.029072] sd 4:0:0:0: [sdb] tag#0 Sense Key : Hardware Error [current] [descriptor] 
[1962219.029074] sd 4:0:0:0: [sdb] tag#0 Add. Sense: No additional sense information
[1962219.029077] sd 4:0:0:0: [sdb] tag#0 CDB: ATA command pass through(16) 85 06 20 00 00 00 00 00 00 00 00 00 00 00 e5 00
[1962219.111836] sd 4:0:0:0: [sdb] tag#0 FAILED Result: hostbyte=DID_ERROR driverbyte=DRIVER_SENSE
[1962219.111839] sd 4:0:0:0: [sdb] tag#0 Sense Key : Hardware Error [current] [descriptor] 
[1962219.111841] sd 4:0:0:0: [sdb] tag#0 Add. Sense: No additional sense information
[1962219.111844] sd 4:0:0:0: [sdb] tag#0 CDB: ATA command pass through(12)/Blank a1 06 20 da 00 00 4f c2 00 b0 00 00
[1962251.479639] JBD2: Invalid checksum recovering block 144 in log
[1962251.574260] JBD2: recovery failed
[1962251.574265] EXT4-fs (dm-4): error loading journal
[1962258.650930] JBD2: Invalid checksum recovering block 144 in log
[1962258.749283] JBD2: recovery failed
[1962258.749288] EXT4-fs (dm-4): error loading journal

This generally means that there were issues with the unmount and the "checksum"  for block 144 in the journal does not match the actual checksum from disk.  This means there is an error reading the journal, and to prevent further corruption EXT4-fs will not mount via device mapper.

So how do we fix this?  If this was not encrypted you could google this error and find out to run FSCK and hopefully be done with it.

Lets start with a quick reminder of the utility `lsblk`.

root@CLCFQ92:~# lsblk --fs /dev/sdb
NAME                                          FSTYPE      LABEL  UUID   
sdb                               
└─sdb1                                        crypto_LUKS        ce6cebbc-5026-4f47-9a22-da4aecfd26ad 
  └─luks-ce6cebbc-5026-4f47-9a22-da4aecfd26ad ext4        Backup e7bab3dc-87ce-4a7d-b758-34e2839b51f0 

 This 'console' output does not render well above using the blog defaults, so I'll have to modify it for clarity, but the thing to notice is that the File System type for sdb1 is NOT ext4, it is crypto_LUKS.  There is then an extended partition that is 'ext4' called luks-.  This luks partition is the one you want to run fsck on.  NOT /dev/sdb1 (or /dev/sdb).

So lets first open the encrypted fs...

root@CLCFQ92:~# cryptsetup luksOpen /dev/sdb1 corrupted
Enter passphrase for /dev/sdb1: 
Now, lets recover the device via the name ("corrupted") we mapped to the luks partition... 
root@CLCFQ92:~# fsck /dev/mapper/corrupted 
fsck from util-linux 2.29.2
e2fsck 1.43.4 (31-Jan-2017)
Backup: recovering journal
JBD2: Invalid checksum recovering block 144 in log
Journal checksum error found in Backup
Backup was not cleanly unmounted, check forced.
Pass 1: Checking inodes, blocks, and sizes
Pass 2: Checking directory structure
Pass 3: Checking directory connectivity
Pass 4: Checking reference counts
Pass 5: Checking group summary information
Free blocks count wrong (436669919, counted=433657941).
Fix? yes
Free inodes count wrong (121861163, counted=121856397).
Fix? yes

Backup: ***** FILE SYSTEM WAS MODIFIED *****
Backup: 245363/122101760 files (0.4% non-contiguous), 54719555/488377496 blocks
Next, disable/close the mapped name to the luks partition:
root@CLCFQ92:~# cryptsetup luksClose /dev/mapper/corrupted
Then mount/open the filesystem the way you normally would using gnome or whatever.  Check dmesh logs for confirmation!

At this point it may be good to look at using the `smartctl` utility, as your disk may be old/dying...

root@CLCFQ92:~# smartctl -a /dev/sdb
SMART Attributes Data Structure revision number: 10
Vendor Specific SMART Attributes with Thresholds:
ID# ATTRIBUTE_NAME          FLAG     VALUE WORST THRESH TYPE      UPDATED  WHEN_FAILED RAW_VALUE
  1 Raw_Read_Error_Rate     0x000f   118   100   006    Pre-fail  Always       -       200743680
  3 Spin_Up_Time            0x0003   094   093   000    Pre-fail  Always       -       0
  4 Start_Stop_Count        0x0032   100   100   020    Old_age   Always       -       72
  5 Reallocated_Sector_Ct   0x0033   100   100   036    Pre-fail  Always       -       0
  7 Seek_Error_Rate         0x000f   073   063   030    Pre-fail  Always       -       24115411
  9 Power_On_Hours          0x0032   077   077   000    Old_age   Always       -       20273
 10 Spin_Retry_Count        0x0013   100   100   097    Pre-fail  Always       -       0
 12 Power_Cycle_Count       0x0032   100   100   020    Old_age   Always       -       39
183 Runtime_Bad_Block       0x0032   100   100   000    Old_age   Always       -       0
184 End-to-End_Error        0x0032   100   100   099    Old_age   Always       -       0
187 Reported_Uncorrect      0x0032   100   100   000    Old_age   Always       -       0
188 Command_Timeout         0x0032   100   100   000    Old_age   Always       -       0
189 High_Fly_Writes         0x003a   100   100   000    Old_age   Always       -       0
190 Airflow_Temperature_Cel 0x0022   053   043   045    Old_age   Always   In_the_past 47 (Min/Max 42/47 #179)
191 G-Sense_Error_Rate      0x0032   100   100   000    Old_age   Always       -       0
192 Power-Off_Retract_Count 0x0032   100   100   000    Old_age   Always       -       19
193 Load_Cycle_Count        0x0032   100   100   000    Old_age   Always       -       767
194 Temperature_Celsius     0x0022   047   057   000    Old_age   Always       -       47 (0 19 0 0 0)
195 Hardware_ECC_Recovered  0x001a   022   021   000    Old_age   Always       -       200743680
197 Current_Pending_Sector  0x0012   100   100   000    Old_age   Always       -       0
198 Offline_Uncorrectable   0x0010   100   100   000    Old_age   Offline      -       0
199 UDMA_CRC_Error_Count    0x003e   200   200   000    Old_age   Always       -       0
240 Head_Flying_Hours       0x0000   100   253   000    Old_age   Offline      -       12697 (213 75 0)
241 Total_LBAs_Written      0x0000   100   253   000    Old_age   Offline      -       3453343066
242 Total_LBAs_Read         0x0000   100   253   000    Old_age   Offline      -       2807657092

Based on the output from the SMART controller, this disk is having a lot of errors and should be backed up and disposed of.

Friday, March 2, 2018

Easy install of NVIDIA SDK on Linux

Spent some time looking around for the best solution to this problem.  I think that it is best to download the 1.8GB installer from nvidia.  Then execute something like the following:

./cuda_9.1.85_387.26_linux.run --no-drm --no-opengl-libs --extract=/home/ottch/Development/nvidia_cuda_9_1/ --toolkit --toolkitpath=/home/ottch/Development/nvidia_cuda_9_1/ --silent

Next you'll need to execute the cuda-linux .bin file that is generated in the toolkitpath by the last command.  Ensure to set the prefix to something other than /usr/local/cuda-9.1 if you don't have sudo.


Tuesday, September 26, 2017

Export oVirt Image/Template for VMware

oVirt supports exporting your VM or template to multiple formats.  You can find a decent overview of the utility here, [[https://docs.openstack.org/image-guide/convert-images.html] https://docs.openstack.org/image-guide/convert-images.html]

 QCOW2 (KVM, Xen) - *.qcow2 QED (KVM) - *.qed raw - *.raw (Sometimes no file extension provided) VDI (VirtualBox) - *.vdi VHD (Hyper-V) - *.vpc VMDK (VMware) - *.vmdk

The utility to perform Exports is 'qemu-img' with the sub-command 'convert'

For example, I currently have a VM Template Image in my GlusterFS storage domain.  This storage domain is mounted through the hypervisor "rosie-carreiro", so I first SSH in to the hypervisor, and 'cd' to the path where the RAW template resides.

Using the oVirt admin console, I am able to identify that the template/image has a UUID of, bbb58b82-7252-41e2-9b28-72cbf74d98e4.
There are other CLI tools that allow you to query storage domains and resolve UUIDs to names, however the UI is pretty intuitive for new users.

When you run 'df -h' on an oVirt hypervisor, you can see the mount points used:
pedro-godines.mycompany.com:/home/exports/iso  399G   25G  374G   7% /rhev/data-center/mnt/pedro-godines.mycompany.com:_home_exports_isoterri-wolven.mycompany.com:/home/exports       847G  136G  711G  17% /rhev/data-center/mnt/terri-wolven.mycompany.com:_home_exportsrosie-carreiro.mycompany.com:/home/exports     8.2T  761G  7.4T  10% /rhev/data-center/mnt/rosie-carreiro.mycompany.com:_home_exportsglusterfs.mycompany.com:/gv0                   1.9T   82G  1.8T   5% /rhev/data-center/mnt/glusterSD/glusterfs.mycompany.com:_gv0

In this case the Template is in the GlusterFS "gv0" volume, so I first 'cd' to /rhev/data-center/mnt/rosie-carreiro... and find the directory with the UUID, bbb58b82-7252-41e2-9b28-72cbf74d98e4.

  [root@devops bbb58b82-7252-41e2-9b28-72cbf74d98e4]# ls -ahlt  total 33G  drwxr-xr-x. 9 36 36 4.0K Aug 25 19:08 ..  drwxr-xr-x. 2 36 36 4.0K Aug 25 13:16 .  -rw-r--r--. 1 36 36  318 Aug 25 13:16 4b66fd92-99a6-4651-8288-24f50fd3596a.meta  -rw-rw----. 1 36 36  40G Aug 25 13:16 4b66fd92-99a6-4651-8288-24f50fd3596a  -rw-rw----. 1 36 36 1.0M Aug 25 12:58 4b66fd92-99a6-4651-8288-24f50fd3596a.lease

You can also view the metadata which specifies the format and description.

  [root@devops bbb58b82-7252-41e2-9b28-72cbf74d98e4]# cat 4b66fd92-99a6-4651-8288-24f50fd3596a.meta  DOMAIN=8fe3f7f3-15c9-4376-b20e-5e237b31b185  CTIME=1503680317  FORMAT=RAW  DISKTYPE=2  LEGALITY=LEGAL  SIZE=83886080  VOLTYPE=SHARED  DESCRIPTION={"DiskAlias":"Windows7_Disk1","DiskDescription":""}  IMAGE=bbb58b82-7252-41e2-9b28-72cbf74d98e4  PUUID=00000000-0000-0000-0000-000000000000  MTIME=0  POOL_UUID=  TYPE=SPARSE  GEN=0  EOF

You can now export the template/image to your desired format:

  [root@rosie-carreiro bbb58b82-7252-41e2-9b28-72cbf74d98e4]# qemu-img convert -f raw -O vmdk -o adapter_type=lsilogic 4b66fd92-99a6-4651-8288-24f50fd3596a /root/DevImage-1.1.vmdk
Once completed, verify:  [root@rosie-carreiro bbb58b82-7252-41e2-9b28-72cbf74d98e4]# ls -halt /root/DevImage-1.1.vmdk  -rw-r--r--. 1 root root 33G Aug 27 16:58 /root/DevImage-1.1.vmdk

NOTE: adapter_type=lsilogic is important because qemu-img VMDK output defaults to using IDE.  This means that you cannot later extend the size of the disk in VMware, as the option will actually be grayed out/disabled in vSphere.  Use the lsilogic scsi controller format to support extending your disks.

Thursday, August 3, 2017

Setting VirtualBox SMBIOS Settings to match your PC

In some cases you may want your VM to emulate your physical machine.  For example, if you want to set the Serial Number/Service Tag to match your laptop, you can do this with the following steps:

  1. sudo dmidecode -t system
  2. VBoxManage setextradata "VM name" "VBoxInternal/Devices/pcbios/0/Config/DmiSystemSerial" "#######"
In Step two above, you would not use the #######, but instead use the Serial Number displayed when running dmidecode.

Essentially what we are doing is configuring the SMBIOS (System Management BIOS) on the VirtualMachine to have the same strings/settings as the actual PC.  This can be useful in a scenario in which you are running some software within a virtual machine that expects the hardware to be of a specific vendor or serial number.

More information about the SMBIOS can be found here:

More information about setting VirtualBox VM SMBIOS data can be found here:

And last, more information about how to use dmidecode on your Linux PC can be found here:

This technique can be used to "spoof" the VM's Product ID, Serial Number, BIOS Version, Manufacturer and really any other SMBIOS value.

DISCLAIMER:
I AM NOT RESPONSIBLE FOR ANY MISUSE OF SOFTWARE COPYRIGHT LAWS RESULTING FROM THE USE OF THIS INFORMATION

Saturday, August 6, 2016

Linux, Newest Kernel, Latest Hardware, Windows 10


About eight years ago I installed Ubuntu Intrepid Ibex, which I believe was Ubuntu 8.10.  I had a Dell desktop at work and they just rolled out, "Trusted Desktop".  The original intention of trusted desktop is simply to ensure an end-user's workstation is safe, free of viruses, and has the most recent security updates.  This helps to keep malware and attackers out of the corporate network when users plug in to it daily.

The problem for me is that because the corporation was so large, they did not ask or care about the developer's needs.  The first version of trusted desktop they rolled over top of Windows XP completely removed Administration capability, as well as installed several incompatible drivers and encryption software combinations.  Eventually these systems began showing the "Blue screen of death", and crawling to a halt under the poorly designed implementation of trusted platform computing.

At this point I saw where Windows was going with my company and discovered they would "allow" employees to use Linux if they signed a waiver and ensured they implemented a compliant disk encryption policy.  So I was off, installing Ubuntu, Virtualbox and Windows XP VM to support Windows specific work software I needed to use.  In this case it was mostly Microsoft Office and the ActiveID client drivers for my smartcard to work with the VPN software.

I didn't need wireless because this was a desktop plugged in at work.  However I did have two outputs on my video card and hoped I would be able to run a similar dual head/monitor display, the way I had been doing on XP for a couple of years.  I quickly had flashbacks of trying to get wireless drivers working on Mandrake Linux, circa 2004.  It was only a bit painful getting Ibex to use my Radeon correctly, but after all of this I was content for about a year.

Unfortunately, a year later support for 8.10 died out, and it was time to upgrade to 9.04, Jaunty. In that release, support for my old ATI Radeon GPU was dropped in favor of the newest version of X that was shipping w/ Jaunty.  I felt betrayed by the Linux community for leaving my crappy old GPU behind.  I had no idea how to write my own driver then, had my own work to do, and so I gave up and went back to Windows XP and then 7 for a long time.  Of course, later I would provide systems support for about fifty developers running Ubuntu 14.04 LTS, but this topic would cause us to digress as I usually do.

Well, this past week I have gone back to Linux, this time choosing Debian Jessie 8.  I chose Debian because I am feeling unsure about where Canonical will be taking Ubuntu in the future, and I wanted something I was already familiar with in regard to package management.  For example, I have recently used a Slackware 10 distribution on an old laptop I have, but it leaves much to be desired in regard to community support for the latest hardware.

After choosing Debian for my OS, I got a new Dell Precision 7710 laptop.  This thing really packs a punch with:
  • Intel® Core™ i7-6820HQ CPU @ 2.70GHz
  • Intel Skylake GPU w/ CPU
  • Nvidia® Quadro® M3000M w/4GB GDDR5
  • 32GB (4x8GB) 2133MHz DDR4 SDRAM, Non-ECC
  • Hynix 512GB M.2 PCIe NVMe Class 40 Solid State Drive

You can imagine my disappointment when after 8 years passing since I ran Linux on Dell for my personal system, my desktop booted with a notification that my Cinnamon desktop was being rendered in software mode.  Furthermore, my wireless interface was nowhere to be found.

The first issue was with a feature in the BIOS being enabled called Optimus.  I don't want to make this entire post about Optimus, so I'll use a reference from Wikipedia. "Nvidia Optimus is a computer GPU switching technology created by Nvidia which, depending on the resource load generated by client software applications, will seamlessly switch between two graphics adapters within a computer system in order to provide either maximum performance or minimum power draw from the system's graphics rendering hardware."

Apparently the Dell supported version of Ubuntu knows how to handle configuration this correctly.  However, Debian Jessie out of the box could not.  I chose not to attempt to enable Optimus (Optimux would have been a better name.) support on Debian, but found some interesting work here, https://nouveau.freedesktop.org/wiki/Optimus/ that may assist if you choose to do so.  For me, I have simply disabled the setting in the BIOS, and have opted for the NVidia GPU to be my primary display adapter.  Perhaps later I will investigate Optimus further.

However this led me to my next issue, in that my GPU is not yet supported by Nouveau.  The Quadro M3000M is part of the Maxwell-2 series.

NVIDIA Quadro Mobile Specification Comparison (High-End)
Quadro M5000MQuadro M4000MQuadro M3000M
CUDA Cores153612801024
Memory Clock5GHz GDDR55GHz GDDR55GHz GDDR5
Memory Bus Width256-bit256-bit256-bit
VRAM8GB4GB4GB
FP641/321/321/32
TDP100W100W75W
GPUGM204GM204GM204
ArchitectureMaxwell 2Maxwell 2Maxwell 2

A quick review of the list at https://nouveau.freedesktop.org/wiki/CodeNames/ will show you that this GPU is not supported.  So, I had to install the bundle available from Nvidia.  The important thing to remember when bundling the manufacture's driver is to ensure DKMS (Dynamic Kernel Module Support) is installed and that Nvidia uses DKMS to manage the kernel module between kernel updates.

So with my GPU now working, it was time to figure out the issue with my wireless.  A quick `lspci | grep Wireless` resolved,

02:00.0 Network controller: Intel Corporation Wireless 8260 (rev 3a)

The firmware for Intel wireless adapters generally ends up in a package called, 'iwlwifi' and once installed on most systems, will match the vendor id on your hardware during modprobe, and load the correct module.  As luck would have it, this card's module was not added/patched until November 2015.

This means my driver doesn't really show up until the November 2015 timeframe, which is kernel 4.3.  Turns out Debian has backports up to Kernel 4.6! So, upgrading with the backports should include the firmware for my wifi card.  Backports warns you to only update a package if you NEED it, and encourages you not to upgrade everything.  However, so much depends on the Linux kernel, that upgrading that specific package creates a dependency for many other backport requied packages.  As a result, I ended up using backports for pretty much all of my software.  Which is Virtualbox, X, and Gnome3.

To perform this upgrade, first gloss over, https://backports.debian.org/Instructions/.  Then, after you have added the backports repo, run the following,

$ sudo apt-get -t jessie-backports install linux-image-amd64

Once this is complete, rebooting your PC should prompt you for the latest kernel at the Debian GRUB screen, in my case this is 4.6+74~bpo8+1.  If I understand this naming convention correctly, it means
"Linux Kernel 4.6, Build number 74, Backport for 8.0 Build 1".  Which is quite the mouthful.

As a bonus, the above kernel will also include support for the latest bluetooth adapter!  The end result of all this work was a bleeding edge opensource operating system using Virtualbox 5.0 (from backports) which has USB 3.0 support and 3D acceleration!